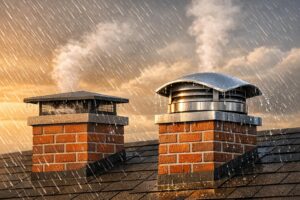
Winter fires can be cozy, but a poorly maintained chimney is a safety hazard. Here’s what you need to know to prepare your chimney for the season:
- Chimney dangers: Creosote buildup (fire risk), carbon monoxide leaks, and moisture damage from freezing and thawing.
- Essential safety steps: Test smoke and carbon monoxide detectors monthly. Clean creosote if it’s 1/8 inch thick; call a professional for 1/4 inch or more.
- Tools and checks: Use a flashlight for inspections, a chimney brush for cleaning, and wear protective gear.
- Exterior care: Inspect the chimney cap, crown, and flashing for damage. Waterproof masonry to prevent cracks.
- Fireplace use: Burn seasoned hardwood, avoid trash or green wood, and keep fires small and controlled.
Schedule annual inspections and cleanings to keep your home safe and warm this winter. If you’re unsure or spot serious issues, contact a certified professional.
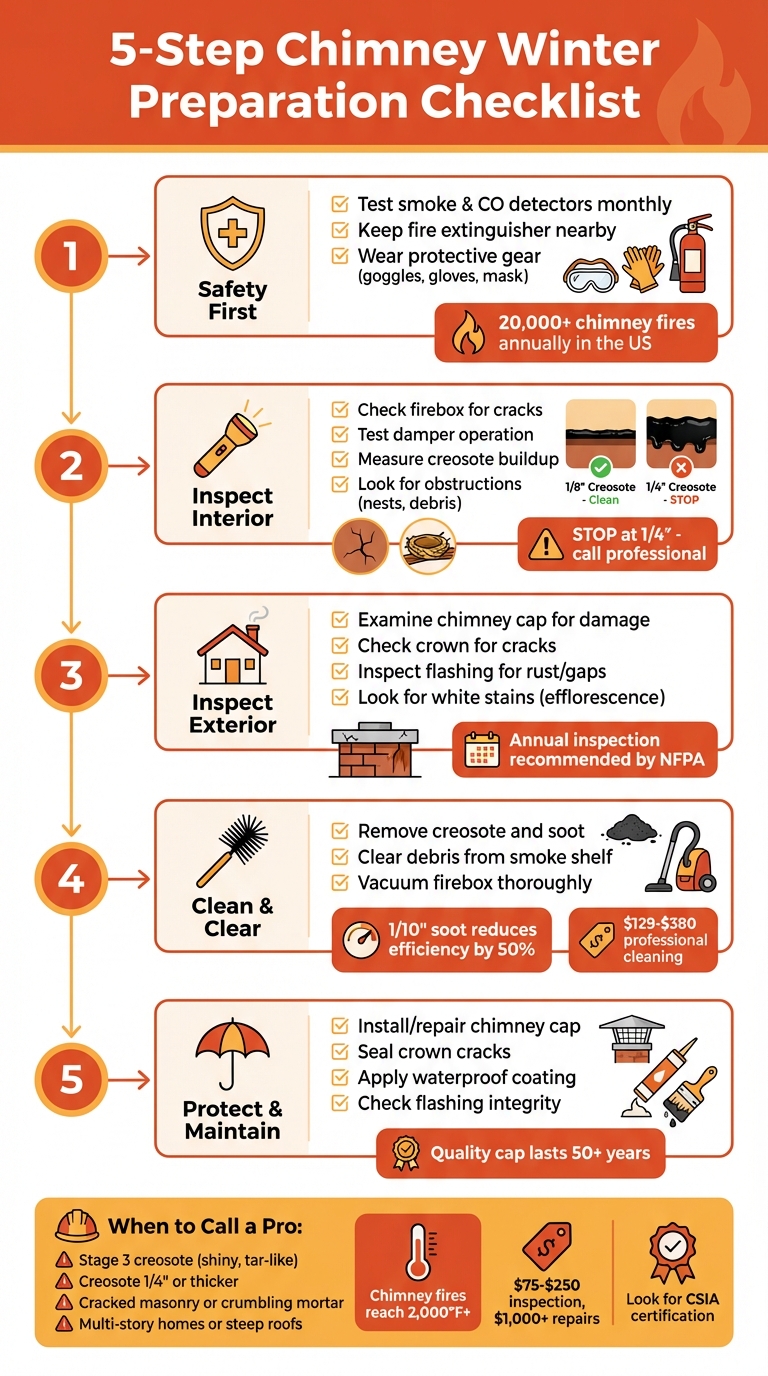
5-Step Chimney Winter Preparation Checklist
Winter Chimney Cleaning Tips – Outdoor HowTo From Home Work With Hank
sbb-itb-5427fa3
Safety Checks and Tools You Need
Before diving into any chimney work, it’s essential to prioritize safety. With over 20,000 chimney fires happening each year in the United States, the risks are far too serious to ignore. Creosote, a highly flammable byproduct of burning wood, ignites at just 451°F, and chimney fires can reach temperatures exceeding 2,000°F. Taking the right precautions ensures both safety and efficiency during your chimney inspection.
Household Safety Precautions
Start by securing your home environment. Test your smoke and carbon monoxide detectors monthly, and replace their batteries twice a year. These devices should be installed on every level of your home, especially near bedrooms [15,18]. Alarmingly, over 20,000 people visit emergency rooms annually due to carbon monoxide exposure.
Keep a dry-chemical fire extinguisher close to your fireplace. Before beginning any inspection or cleaning, make sure the fire is fully out, and clear the hearth of ashes and debris. Protect nearby furniture and floors by covering them with tarps or sheets to contain any soot [11,12,13]. To prevent soot from spreading into your living space, seal the fireplace opening completely with poly sheeting and duct tape [6,12].
If your inspection involves accessing the roof, confirm that the roof is stable and safe to walk on. Use a flashlight to check for bird nests, animals, or other obstructions in the chimney before climbing [11,13].
Tools and Supplies You’ll Need
Proper gear is non-negotiable. Wear safety goggles, heavy-duty gloves, a dust mask or respirator, and non-skid shoes if you’re working on the roof [6,11,12,13,14,19].
For inspections, you’ll need a high-powered flashlight and a fireplace poker to perform a scratch test. If you find creosote buildup measuring 1/8-inch thick (roughly the thickness of a nickel), it’s time to clean [12,19]. Cleaning requires a chimney brush matched to your flue type – metal bristles for clay liners and plastic bristles for metal liners – along with extension rods and a long-handled brush for the firebox [12,14].
An industrial shop vacuum with a HEPA filter is ideal for containing dust. Keep the vacuum unit outside and extend the hose into your work area [11,12]. If you’re cleaning from the roof, use an extension ladder that extends at least two feet above the eaves, and place its base on a stable, hard surface like concrete.
When to Call a Professional
Certain situations call for professional expertise. If you encounter Stage 3 creosote (a shiny, tar-like buildup), stop immediately. A creosote layer of 1/4-inch or more requires specialized tools and professional cleaning [5,6,12].
Other red flags include white salt deposits (efflorescence), cracked masonry, crumbling mortar, or gaps in clay liner sections. These issues are best handled by professionals [12,13]. Additionally, multi-story homes, steep roofs, icy conditions, or any scenario that makes you uneasy about working at heights are good reasons to hire an expert [12,20]. Professional inspections and cleanings typically cost between $75 and $250, while masonry repairs can exceed $1,000 [10,20].
When hiring, look for technicians certified by the Chimney Safety Institute of America (CSIA) or the National Fireplace Institute [10,12]. To avoid the busy fall season, schedule inspections in the spring or early summer. This timing also ensures any necessary repairs are completed before the colder months arrive [6,20].
Inspect Your Chimney and Fireplace
Keeping your chimney and fireplace in good condition is crucial to avoid expensive repairs and potential hazards. According to the National Fire Protection Association (NFPA), you should have your chimney inspected at least once a year. A professional Level 1 inspection typically takes 30 to 60 minutes, but you can also do a basic visual check to spot any glaring issues. This step is an essential part of getting your chimney ready for the demands of winter.
Fireplace Firebox Inspection
The firebox endures the most direct exposure to heat and smoke, so it requires special attention. Wait at least 72 hours after your last fire to begin the inspection. Remove any décor and debris, then sweep or vacuum out the cold ashes, leaving about an inch at the bottom for insulation.
Use a bright flashlight to carefully examine the bricks and mortar. Be on the lookout for visible gaps, crumbling areas, or cracks in the firebox floor. These cracks are particularly dangerous because they can allow heat, smoke, and carbon monoxide to escape into your home. As A1 Chimney Specialist warns:
If the heat and smoke can escape from the fireplace through a crack, it increases the risk of an accidental fire somewhere else in your home.
Check for rust on metal components and any musty odors. Clean the glass doors using vinegar to remove soot buildup. If repairs are needed, avoid using standard mortar. Bob Vila advises:
Never try to repair firebrick with regular mortar, as the mixture cannot stand up to high heat.
Should you find cracks or other serious issues, stop using the fireplace immediately and contact a professional mason. Afterward, inspect the damper and interior walls to ensure everything is in safe working order.
Damper and Chimney Interior Check
Before inspecting the damper and flue, put on safety goggles and a dust mask. Use a mirror to check around offsets, which can angle up to 30 degrees. Scrape the interior walls of the chimney – if you find residue thicker than 1/8 inch, it’s time for a cleaning.
Creosote buildup progresses through three stages: flaky (Stage 1), tar-like (Stage 2), and hardened glaze (Stage 3). The Chimney Safety Institute of America emphasizes:
Open masonry fireplaces should be swept at 1/8″ of sooty buildup, and sooner if there is any glaze present in the system.
Stage 3 glazed creosote is particularly hazardous and often requires professional chemical treatment.
Check for physical obstructions like bird nests, squirrel activity, leaves, or fallen masonry. Don’t forget the smoke shelf behind the damper, as debris can collect here and block airflow. If your fire burns sluggishly or smoke enters your room, these could be signs of a blockage or heavy creosote buildup. Additionally, a strong asphalt-like smell might indicate creosote, while musty odors often point to moisture issues.
Exterior Chimney Inspection
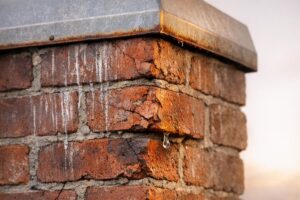
Once the interior is inspected, shift your attention to the exterior of the chimney. From ground level, examine the chimney using binoculars if necessary. If you’re not comfortable climbing a ladder, you can also inspect the cap and upper masonry from a window or your yard. Look for missing bricks, cracks in the mortar, or rusted and improperly installed flashing where the chimney meets the roof. Black residue between exterior bricks could signal creosote seeping through the structure, while white, powdery stains (efflorescence) may indicate moisture or drainage problems.
Step back and assess whether the chimney appears to sway, bow, or lean – these could be signs of structural instability. The Connecticut Department of Consumer Protection highlights:
Vertical cracking in the liner is a sure sign of a previous flue fire and is a serious problem that will need repair.
Inspect the chimney cap to ensure it’s free of rust or damage and securely attached to keep out animals and debris. Trim any overhanging tree branches that could damage the cap or restrict airflow. This exterior check complements the interior inspection, ensuring your chimney is ready for the challenges of winter.
Clean and Clear Your Chimney
Once you’ve inspected your chimney, the next step is giving it a thorough cleaning to keep your home safe and your fireplace running efficiently this winter. Removing creosote, soot, and debris is essential to reduce fire risks and maintain proper heating performance. While basic cleaning can be a DIY task for some, knowing when to bring in a professional could save you from potential hazards.
Why Removing Creosote Is Important
Creosote, a sticky, tar-like substance formed from unburned wood oils, clings to chimney walls over time. Not only does it increase the risk of chimney fires, but it also hampers your fireplace’s ability to heat effectively. Ana Chevalier from Family Handyman highlights this:
"As little as 1/10-in. of soot can reduce heat transfer efficiency by up to 50 percent".
DIY Fireplace Cleaning Tips
If the creosote buildup in your chimney is less than 1/8 inch thick and has a dull, powdery texture, you can likely clean it yourself. Here’s how to do it safely:
- Start by sealing the fireplace opening with plastic sheeting, taping it securely to prevent debris from escaping. Insert a shop vacuum hose through the plastic to capture falling soot and dust.
- Wear protective gear, including safety goggles, a dust mask, and gloves.
- Use a metal bristle brush for clay flue liners or a poly brush for stainless steel liners to avoid scratching. Attach extension rods to your brush to reach the flue walls, scrubbing thoroughly from the top or through the fireplace opening.
- For the smoke shelf, use a flexible noodle brush to remove built-up debris.
- Collect all the creosote and soot in a metal bucket, as these materials remain highly flammable.
This process not only reduces fire risks but also ensures your fireplace operates efficiently during the cold months.
When to Call a Professional
If you notice creosote buildup that’s 1/4 inch thick or has a shiny, hardened, tar-like appearance (known as Stage 3 creosote), it’s time to call a professional. The Family Handyman team warns:
"If you have 1/4-in. of creosote or more, do not use the fireplace again until it is cleaned – a chimney fire could occur at any time".
Additionally, if it’s been over a year since your last cleaning, scheduling professional help is a smart move. Experts use advanced tools like rotary power whips and chemical treatments that go beyond what standard brushes can achieve. Professional chimney cleaning typically costs between $129 and $380 .
For homeowners in the Seattle-Tacoma area, 1 Chimney Services provides thorough cleaning to remove creosote and debris, ensuring your chimney is safe and ready for the winter season. After cleaning, consider additional steps to protect your chimney from potential winter damage.
Protect Your Chimney from Winter Damage
After cleaning your chimney, it’s crucial to shield it from winter’s harsh conditions to avoid expensive repairs. Paying attention to the chimney cap, crown, and waterproofing can help prevent moisture damage and keep your chimney functioning safely throughout the colder months. These steps build on your cleaning efforts to ensure your chimney stays in top shape all winter.
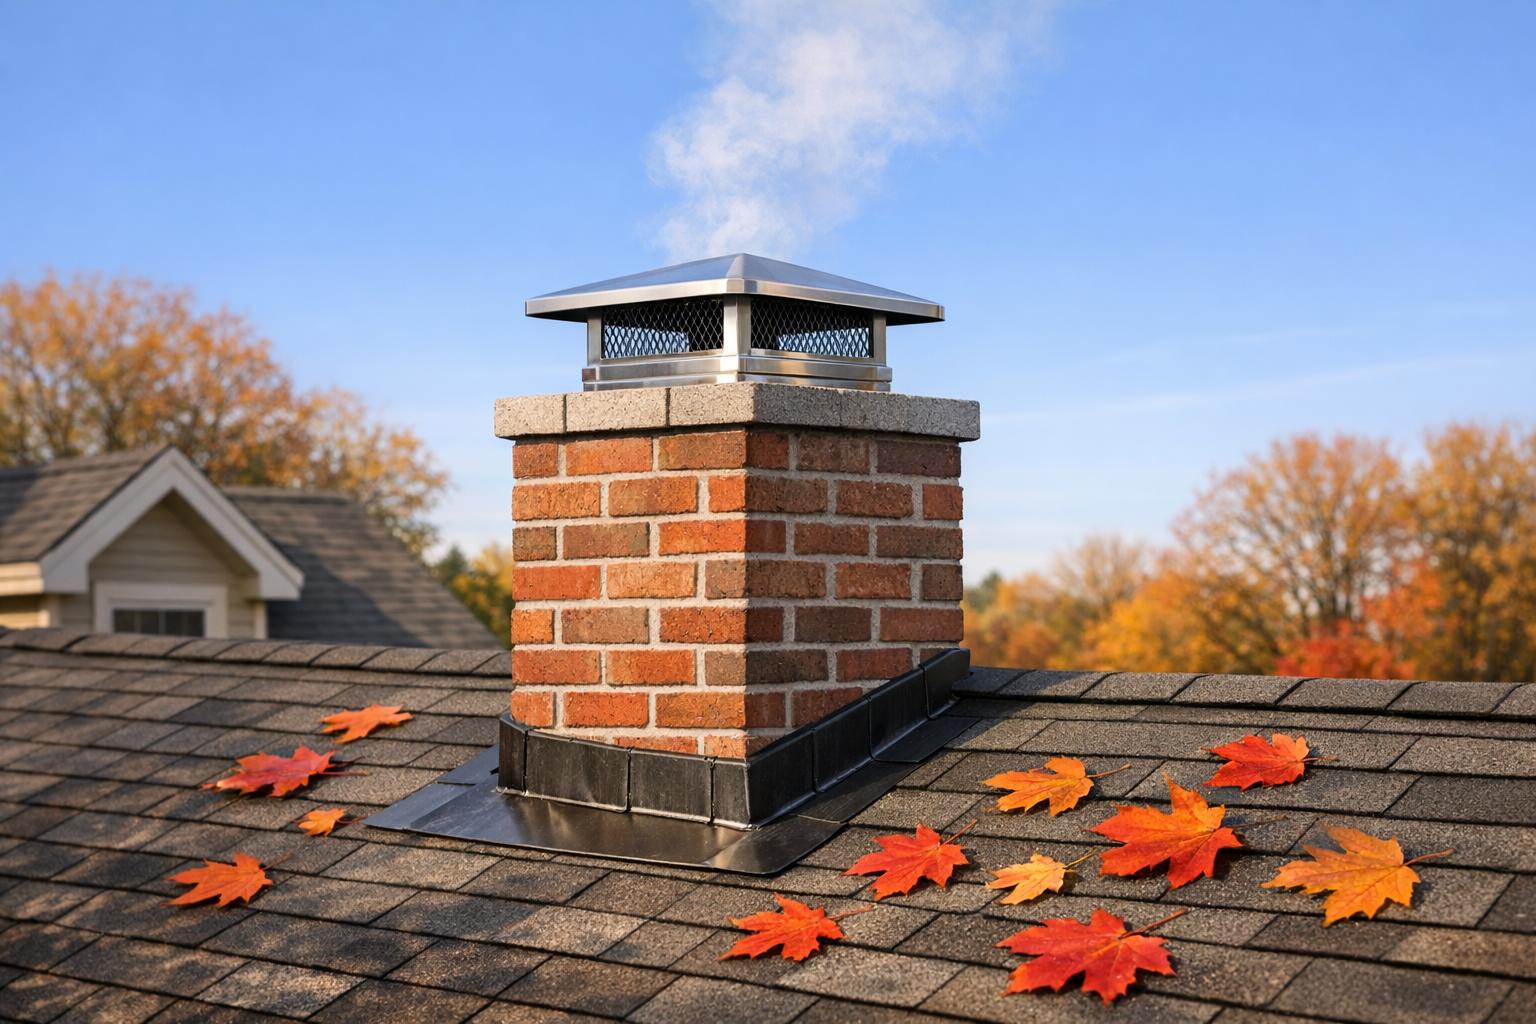
Install or Inspect Your Chimney Cap
The chimney cap is your chimney’s first line of defense against rain, snow, and even animals. According to the Chimney Safety Institute of America:
"Chimney caps, also called rain covers, are probably the most inexpensive preventive measure that a homeowner can employ to prevent water penetration and damage to the chimney."
Start by examining your chimney cap to ensure it has wire mesh on all sides. Older caps with only a hood can leave openings for critters to enter. Check for damage, such as a bent hood, which can block proper venting and potentially allow smoke or carbon monoxide to back up into your home. Also, look for rust – especially if your cap isn’t made of stainless steel or copper. If rust or other significant damage is present, replacing the cap is a must. Investing in a high-quality stainless steel cap can save you trouble in the long run, as these can last 50 years or more with proper care.
Check and Repair the Chimney Crown
The chimney crown, located at the very top of your chimney, is designed to shield the interior from weather exposure. Even small cracks in the crown can let water seep in, freeze, and cause further damage. Inspect the crown for cracks, spalling (flaking or crumbling), or areas where water tends to pool after rain or snow.
For minor cracks, you can handle repairs yourself on a dry day with at least four hours of clear weather. Start by cleaning the surface with a stiff nylon brush, then fill larger cracks with patching cement or silicone caulk. To add extra protection, use a flexible elastomeric brushable crown sealer (available for about $60). Begin by pressing the first coat into the cracks, smoothing it out, and then applying a second coat once the first one becomes tacky. However, if the crown has deep cracks, crumbling masonry, or is difficult to reach safely, it’s best to call a professional. Ignoring crown damage can lead to repairs that may cost over $3,000, so early maintenance is essential.
Waterproofing and Flashing Maintenance
Brick and masonry naturally absorb water, which can freeze and expand, leading to cracks and deterioration. Applying a vapor-permeable masonry water repellent can prevent liquid from seeping in while still allowing moisture to escape. Use a low-pressure garden sprayer (usually costing around $35) to apply the repellent, working upward from the base and ensuring it extends about 8 inches down the chimney. Keep an eye out for white, powdery efflorescence, which signals trapped moisture.
Additionally, inspect the flashing – the metal barrier where the chimney meets the roof – for rust, gaps, or separation. Damaged flashing is a common source of leaks and mold. While flashing repairs typically cost between $200 and $500, a full replacement can run up to $2,000. For those who enjoy DIY projects, many of these tasks – including sealing the crown, waterproofing, and installing a new cap – can be completed for under $300 in materials. Together, these efforts will help protect your chimney from winter’s challenges and keep it in excellent condition.
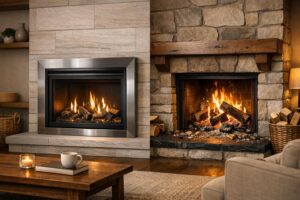
Tips for Safe Winter Fireplace Use
Once your chimney is clean and ready, it’s time to focus on using your fireplace safely throughout the winter. Picking the right firewood, building fires correctly, and staying vigilant about potential issues are key to keeping your home warm and secure during the colder months.
Choose the Right Firewood
For efficient and safer burns, go with dense hardwoods like oak, hickory, sugar maple, beech, or white ash. These woods burn hotter and produce less creosote compared to softwoods such as pine or fir. Make sure your firewood is seasoned for at least six months, with moisture content below 20%. You can tell it’s ready when the ends have cracks and it makes a hollow sound when two pieces are knocked together.
If you want an even better option, kiln-dried firewood is worth considering. It’s dried in a heat chamber to remove moisture and eliminate pests, mold, and fungus, making it safe to store indoors. For regular firewood, store it off the ground with a tarp covering the top, but leave the sides open to allow air circulation. Avoid burning trash, treated wood, or green wood, as these can release toxic fumes and lead to dangerous creosote buildup. Choosing the right wood sets the stage for safer and more efficient fires.
Build Better Fires
Once you’ve got the proper wood, the next step is learning how to build a fire that burns cleanly and safely. Smaller, hotter fires are both safer and more efficient. Start by placing logs toward the back of the firebox and use kindling to ignite the flames – never use flammable liquids. A great technique is the top-down method: stack larger logs on the bottom, medium-sized logs in the middle, and kindling on top. Light the kindling first to create an upward draft, which helps reduce smoke and smoldering.
Before lighting the fire, check that the damper is fully open. On especially cold days, pre-warm the flue by opening the damper and letting warm air from your home rise into it for a few minutes. In tightly sealed homes, crack a nearby window to allow fresh air in and prevent smoke from backing up into the room. Also, don’t overcrowd the firebox – fires need space to breathe.
Monitor for Problems During Winter
Throughout the season, stay alert to warning signs that something might be wrong. A strong, acrid smell or smoke spilling into the room could indicate creosote buildup, a blockage, or negative air pressure. Regularly inspect the flue above the damper with a flashlight and a poker. If you notice creosote buildup reaching 1/8 inch thick (about the size of a nickel), it’s time to schedule a cleaning. If it reaches 1/4 inch or more, stop using the fireplace immediately, as this poses a serious fire risk.
Be mindful of musty odors, which might point to water leaks. Look for rust on the damper, damp spots in the firebox, or white, powdery deposits (efflorescence) on exterior bricks. These signs mean moisture is seeping in and needs to be addressed. When in doubt, call a professional for a mid-season inspection to avoid the risks of a chimney fire or carbon monoxide exposure.
Conclusion
Get your chimney ready for the colder months by focusing on safety checks, inspecting the masonry, clearing out creosote, and addressing moisture issues to ensure a worry-free fireplace experience throughout the season.
Taking care of your chimney regularly helps protect its structure. By inspecting the chimney cap, crown, and flashing before temperatures drop, you can avoid water seeping into the masonry, freezing, and causing expensive damage. Even a small amount of creosote can pose a hazard, so staying on top of maintenance is essential. These efforts not only save you from costly repairs but also help your chimney last longer.
If you’re a homeowner in the Seattle-Tacoma area, 1 Chimney Services provides certified inspections, cleanings, and repairs tailored to the unique demands of the local winter weather.
Schedule your maintenance today, so you can enjoy your first fire of the season with peace of mind and keep your family safe.
FAQs
What are the signs that your chimney needs to be cleaned by a professional?
If you’re noticing certain issues with your chimney, it might be time to call in a professional for a thorough cleaning. Some clear warning signs include smoke seeping back into your home, trouble getting a fire started or keeping it going, and strong, unusual odors wafting from your fireplace. Another red flag is visible creosote buildup – that sticky, black, tar-like substance – as well as heavy soot deposits or downdrafts carrying cold air into your house.
Pay attention to the condition of the chimney itself, too. Cracks, crumbling bricks, or a damaged flue liner are all signs that repairs are needed. Routine cleaning and inspections aren’t just for peace of mind – they’re crucial for preventing chimney fires and keeping your fireplace running safely and smoothly when the temperatures drop.
How can I protect my chimney from moisture damage this winter?
To keep your chimney in good shape during the winter, start by giving the chimney crown a close look. If you spot any cracks or gaps, take care of those repairs right away. Next, ensure your chimney has a durable, snug rain cap – this is essential for keeping out rain, snow, and debris. Don’t forget to inspect the flashing at the base of the chimney; it should be securely in place and completely watertight. For an added layer of defense, apply a waterproof sealant to the masonry. This helps block water from soaking in and freezing, which can lead to serious damage. Tackling these tasks before the cold sets in will help your chimney stay in top condition all winter long.
What kind of firewood helps prevent creosote buildup?
When it comes to minimizing creosote buildup, dry, seasoned hardwood is your best bet. Choose wood that’s been drying for at least 6 to 12 months and has a moisture content below 20%. If you want an even cleaner burn, kiln-dried hardwood is a great option – it burns hotter, produces less smoke, and leaves behind less residue.
Steer clear of green or wet wood. These types of wood generate more smoke, which leads to quicker creosote buildup in your chimney. Hardwoods like oak, maple, and hickory are ideal choices for a safer, more efficient fire this winter.