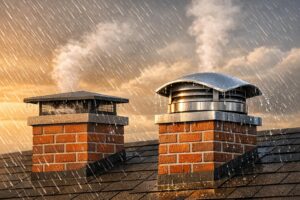
Your chimney flue is a critical safety feature, venting toxic gases and preventing fires. Damaged flues can lead to carbon monoxide leaks, creosote buildup, and even house fires. Here’s a quick overview of what you need to know:
- Signs of Damage: Cracks, missing tiles, smoke issues, rust, or water stains.
- Common Causes: Heat stress, water damage, freeze-thaw cycles, and creosote buildup.
- When to Repair: Minor cracks or gaps can often be fixed for $200–$750.
- When to Replace: Severe damage, shaling, or outdated liners may require a full replacement, costing $1,500–$5,000.
- Maintenance Tips: Annual inspections, regular cleaning, and waterproofing can prevent costly problems.
Addressing flue issues early ensures safety, extends the life of your chimney, and avoids major expenses. Let’s dive into the details.
Signs Your Chimney Flue Needs Repair
Cracks, Gaps, and Missing Tiles
One clear sign of flue damage is shaling – those flaky pieces of material you might find in your fireplace. This happens when the flue liner starts breaking down due to heat stress or moisture exposure.
"Shaling flue tiles are a sign that you should have your chimney liner replaced as soon as possible. If left un-fixed, a damaged chimney liner can cause a dangerous chimney or house fire." – Doctor Flue
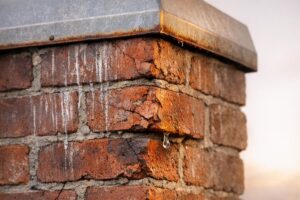
You should also watch for spalling, where bricks crumble or pop, and visible gaps in the masonry. These issues often mean water has seeped in, creating vulnerabilities that allow heat and gases to escape into your home’s walls.
Another important check is the scratch test for creosote buildup. Using a fireplace poker (and the right safety gear), scratch the surface above the damper. If the groove is 1/8 inch deep, it’s time for a cleaning. If it’s 1/4 inch or deeper, stop using your fireplace immediately.
These structural problems don’t just weaken your chimney – they can also cause draft issues, reducing how effectively your chimney vents smoke and gases.
Poor Draft and Smoke Problems
If smoke spills into your living room instead of flowing up the chimney, it’s a sign of blockage in the flue. This issue, often called "puff-back", can happen due to animal nests, leaves, or fallen debris clogging the flue.
"If you have 1/4-in. of creosote or more, do not use the fireplace again until it is cleaned – a chimney fire could occur at any time." – Family Handyman
Be alert for loud cracking or popping sounds during a fire, as these could signal a chimney fire in progress. A strong smoky smell while the fire is burning is another red flag that your flue isn’t venting properly. The National Fire Protection Association (NFPA) advises annual chimney inspections to catch these problems early.
Water Stains and Rust
Moisture damage is another telltale sign of flue trouble. Rust on your damper or firebox often indicates too much water is entering your chimney.
"Rust on the damper or firebox indicates that your chimney contains too much moisture." – Chimney.com
You might also notice water stains on walls or ceilings near the chimney, dripping water in the firebox, or efflorescence – a white, powdery residue – on the outside of your chimney. These issues usually stem from damaged flashing, cracked crowns, or leaky masonry. Inside your home, bubbling wallpaper or peeling paint on walls next to the chimney are further signs of moisture problems. Musty odors can point to mold caused by water intrusion, while strong smoke smells or unpleasant odors may indicate a blocked or cracked flue.
What Causes Chimney Flue Damage
Heat Cycles and Thermal Stress
Chimney flues endure extreme temperatures, often exceeding 450°F, which causes the flue liner to expand and contract repeatedly over time.
"This cycle of expansion and contraction repeats over and over again for years, eventually putting enough strain on the chimney flue to crack it." – Thomas Green, Chimney & Fireplace Expert
The heat inside the flue doesn’t spread evenly, creating uneven pressure points. These temperature swings can lead to cracks in clay or concrete liners, especially in weaker areas. Over time, this repeated stress can result in visible damage, such as shaling – small fragments of the liner breaking off and falling into the fireplace.
On top of heat-related stress, moisture plays a significant role in accelerating flue damage.
Water Damage and Freeze-Thaw Cycles
Water is one of the biggest threats to a chimney flue’s integrity. When moisture seeps into tiny cracks, it can freeze and expand, causing those cracks to grow larger. This process, known as the freeze-thaw cycle, leads to spalling and shaling.
"Once water seeps inside the chimney from tiny cracks, water molecules disintegrate the chimney flue tile… Thus, the chimney flue’s structure starts to crumble." – Golden Gate Chimney
This cycle gradually wears down materials like terracotta, concrete, and mortar joints. Saturated mortar joints are particularly vulnerable, as they can lose their bond and weaken the chimney’s overall structure. In severe cases, this can cause the chimney to lean or even collapse.
In addition to physical damage, chemical reactions from combustion further contribute to the flue’s deterioration.
Creosote and Acidic Gases
Every time you use your chimney, acidic gases from combustion erode the flue liner and mortar joints. When moisture is present, the corrosive effects of these gases become even more damaging.
Another issue is creosote, a sticky, tar-like substance that forms when combustion is incomplete. It condenses on the cooler walls of the flue and is both highly flammable and corrosive. As creosote builds up, it increases the chances of chimney fires, which can cause rapid and severe structural damage. Burning firewood with a moisture content above 20% makes things worse, as it produces more creosote during combustion.
| Stage of Creosote | Appearance | Removal Difficulty | Risk Level |
|---|---|---|---|
| Stage 1 | Soot-like, flaky powder | Easy (Chimney brush) | Low |
| Stage 2 | Black tar-like flakes | Moderate (Rotary tools) | High (Fire risk) |
| Stage 3 | Shiny, glaze-like coating | Extreme (Often requires replacement) | Critical (Severe fire risk) |
Moisture, heat, and combustion byproducts all work together to weaken the chimney flue, making regular maintenance essential to avoid costly repairs or dangerous situations.
How to Re-Line a Chimney Flue | This Old House

Repair vs. Replacement: Making the Right Choice

Chimney Flue Repair vs Replacement Decision Guide
How to Decide Between Repair and Replacement
When deciding whether to repair or replace your chimney liner, the extent and type of damage play a crucial role. For minor issues like small cracks or one or two broken tiles, repairs using heat-resistant sealant are often sufficient and typically cost between $200 and $400. However, if you spot thin, tile-colored fragments in your firebox – a condition known as "shaling" – this signals that the flue liner is deteriorating internally and likely requires a full replacement.
If your clay liner is approaching or has exceeded 50 years, repeated patching is not a long-term solution – it’s time for a replacement. Similarly, metal liners that show signs of corrosion are usually beyond repair and must be replaced. A professional video inspection, costing around $450 on average, can help uncover hidden damage that isn’t visible from the firebox. As you weigh your options, ensure your flue complies with current safety standards.
| Factor | Repair is Sufficient | Replacement is Necessary |
|---|---|---|
| Crack Type | Hairline or minor surface cracks | Deep, vertical, or multiple horizontal cracks |
| Tile Condition | 1–2 broken tiles; remaining tiles intact | Shaling, crumbling, or missing sections |
| Liner Material | Clay or cast-in-place (with minor gaps) | Corroded metal or warped stainless steel |
| System Changes | No changes to appliance or fuel | Converting fuel types (e.g., wood to gas) |
| Age | Well within expected lifespan | Near or exceeding 50 years (for clay) |
| Safety | Strong draft; no carbon monoxide leakage | Blocked flue or evidence of gas spillage |
Let’s break down when targeted repairs can solve the problem and when a complete replacement becomes unavoidable.
When Repairs Are Enough
Localized damage that doesn’t compromise the flue’s overall integrity can often be addressed with simple fixes. However, it’s essential to avoid using your fireplace until cracks are repaired. Hairline cracks in the chimney crown, small mortar gaps, or minor surface wear can be sealed using refractory cement or heat-resistant sealant. These repairs generally cost between $150 and $750 and can restore safe operation without requiring a full liner replacement.
Catching issues early is key. For example, if an annual chimney inspection reveals a few small cracks while the rest of the flue is intact, targeted repairs can add several years to its lifespan. But when damage becomes widespread or presents safety risks, a larger intervention is necessary.
When You Need a Full Replacement
Extensive damage or serious safety concerns signal the need for a full replacement. This is the case if multiple tiles are cracked, shaling is present, or the chimney is entirely unlined – a common issue in older homes. Relining costs typically range from $1,500 to $5,000, with an average price of about $2,500, depending on materials and chimney height.
"In laboratory tests, it took less than four hours for nearby wood materials to catch fire from the intense heat of an unlined chimney." – Chimney Safety Institute of America
A full replacement is also necessary if you’re switching fuel types – like moving from wood to gas – or if your current flue doesn’t meet local building codes, which could impact insurance or home sales. Stainless steel liners, priced at roughly $65 per square foot for materials, are a popular choice due to their durability and ease of installation. While their lifespan (15 to 20 years) is shorter than a clay liner’s 50 years, the lower labor costs and immediate safety improvements often make them a practical option for upgrading existing chimneys.
sbb-itb-5427fa3
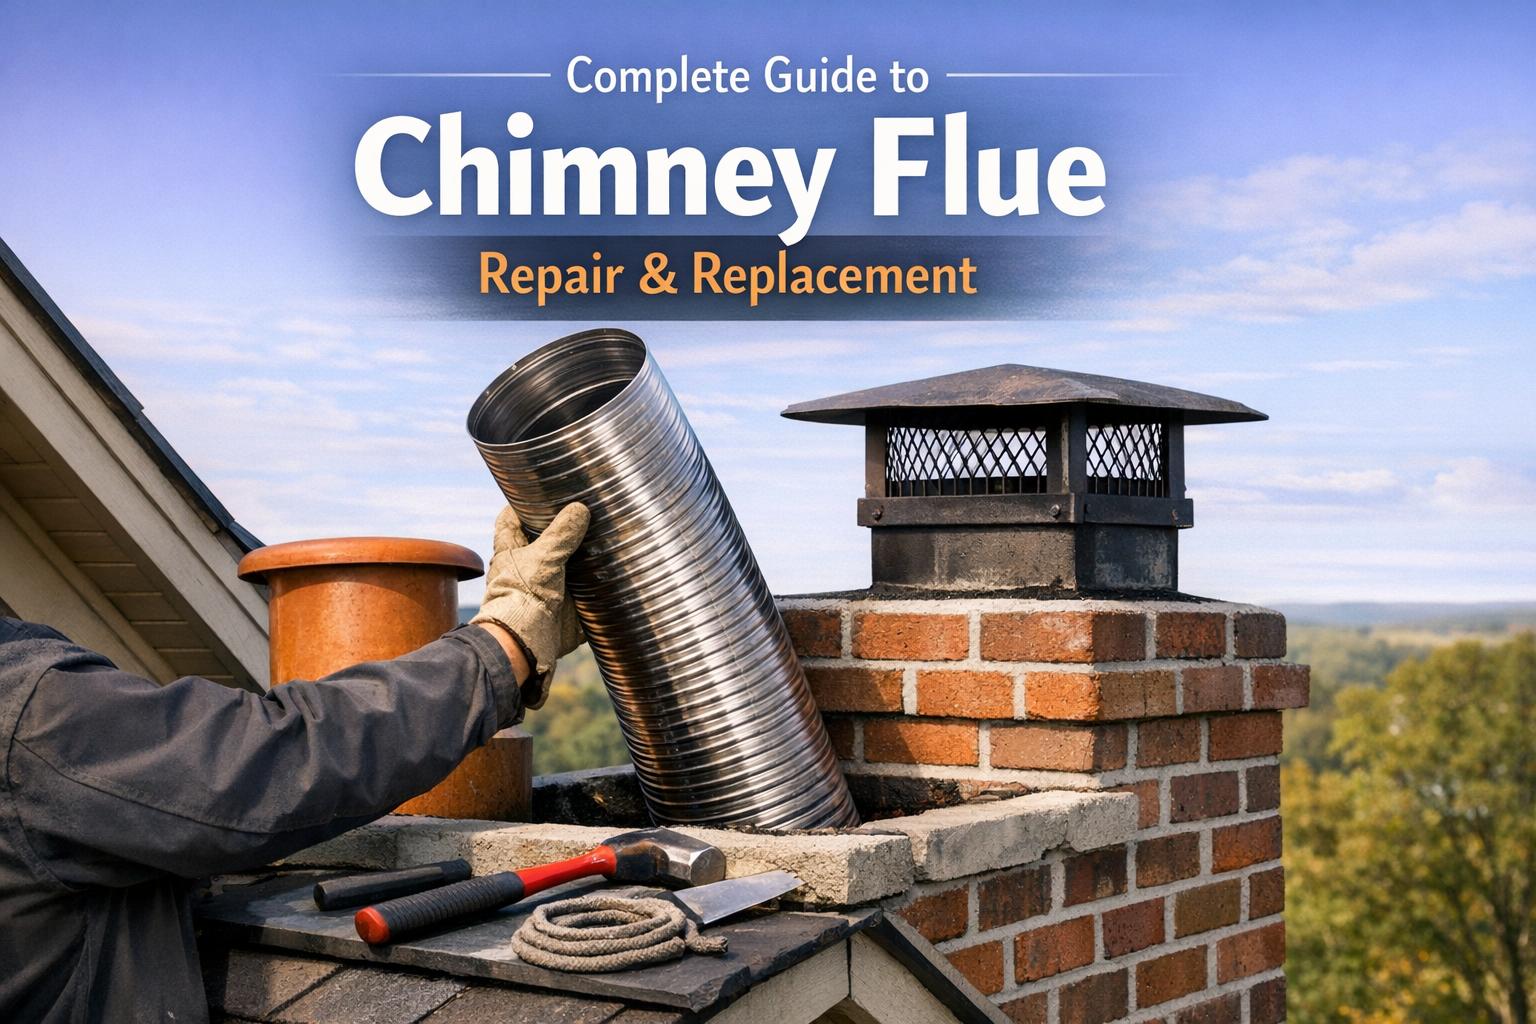
How to Repair and Replace a Chimney Flue
DIY Repairs for Minor Flue Damage
Start by inspecting your cooled chimney for any nests, blockages, or cracks. Use a flashlight to get a clear view, and make sure to cover the fireplace opening to contain any dust during the process. Before tackling repairs, clean the flue thoroughly with a chimney brush. For stainless steel liners, always use a poly (plastic) brush to avoid scratches, while traditional masonry flues can handle stiff wire brushes. A clean surface is essential for patching materials to adhere properly.
For small cracks, apply high-temperature mortar using a trowel. If the chimney crown has cracks, waterproof them with an elastomeric sealer. If you notice crumbling bricks – a condition called spalling – remove the damaged bricks with a chisel and replace them with bricks designed specifically for chimneys.
"Maintaining a clean chimney pipe – whether masonry or stainless steel – keeps your home safe and your heating system running efficiently." – Michael Janssen, Founder, Flue-Pipes.com
Safety is key, so wear protective gear like gloves, goggles, and a mask to shield yourself from toxic creosote and masonry dust. You can find essential tools like chimney brushes, high-temperature mortar, trowels, and chisels at most hardware stores. For more specialized needs, such as liner kits, online retailers are a great option.
If the damage is more severe than minor cracks, it’s best to leave the job to professionals to ensure your chimney is safe and functional.
Professional Flue Replacement Steps
When the damage is too extensive for DIY repairs, professionals step in with advanced tools and techniques to replace the flue safely and effectively. Here’s how they typically handle the process:
First, they perform a detailed inspection using a specialized camera, such as a Chim-Scan, to identify damage and clean out any creosote buildup. For masonry chimneys with outdated clay tiles, they use a tile-breaking device to remove the damaged tiles. If the original damper assembly is in the way, it’s removed with a circular carbide blade saw to make room for the new liner.
Next, a flexible stainless steel liner, rated to withstand temperatures up to 2,100°F, is lowered from the roof into the chimney. In colder regions or for taller chimneys, an insulating material may be wrapped around the liner to prevent condensation issues. To secure the liner, professionals install a cap plate, crown seal, and rain cap at the top. At the bottom, the liner is connected to the appliance or fireplace smoke chamber and sealed with refractory cement.
A full replacement kit typically includes the liner, top plate, rain cap, and appliance connectors. Stainless steel liners generally cost around $65 per square foot, making them a durable and reliable option for most chimneys.
Preventing Future Flue Damage
Taking steps to maintain your chimney not only keeps it running safely but also helps avoid costly repairs down the line.
Annual Inspections and Cleaning
The National Fire Protection Association advises inspecting chimneys, fireplaces, and vents at least once a year. Plan your inspection before the heating season starts. This allows you to catch issues like creosote buildup or cracked liners early.
Creosote, a dangerous and highly flammable byproduct, can ignite at just 451°F. It’s crucial to clean your chimney when creosote buildup reaches 1/8 inch and stop using the fireplace entirely at 1/4 inch buildup. The type of wood you burn also plays a role. Wet or "green" wood requires inspections after about 50 burns, while using dry hardwood can stretch that to around 70 burns.
A Level 1 chimney inspection typically costs between $100 and $250, and chimney sweeping ranges from $130 to $380. These are small expenses compared to the potential damage from chimney fires, which can reach temperatures over 2,000°F in seconds. Regular inspections also set the stage for protecting your chimney from water damage.
Protecting Your Flue from Water
Water is a major culprit behind chimney wear and tear. Installing a stainless steel chimney cap is a simple yet effective way to shield your chimney from rain, snow, and debris. These caps cost about $300 to install and are more durable than galvanized metal versions, which tend to rust in damp conditions.
Don’t overlook your chimney crown, the concrete slab at the top. Seal any cracks with elastomeric coating to keep water from seeping between the liner and masonry. Minor resealing jobs cost between $175 and $600, but neglecting this can lead to full replacements costing $1,800 to $3,000. Additionally, inspect the flashing where the chimney meets the roof. Use silicone-based sealants instead of standard caulk for a long-lasting, watertight bond.
Keep an eye out for white, powdery stains (known as efflorescence), which indicate moisture has penetrated the masonry. For the best results, apply a vapor-permeable waterproofing treatment during warm, dry weather to ensure the sealant cures properly. Keeping water out not only prevents immediate damage but also reduces the risk of future repair headaches.
Catching Problems Early
Beyond inspections and waterproofing, spotting small issues early can help you maintain your chimney’s performance. Look for early warning signs like shaling – flaking or peeling of the chimney’s interior. Installing a chimney thermometer can also help; keeping flue temperatures between 250°F and 500°F minimizes condensation and creosote buildup.
Burning dry, seasoned hardwoods like oak or birch reduces creosote formation and lengthens the time between cleanings. Also, make sure to trim overhanging tree branches to prevent debris from clogging your chimney and to keep animals from accessing the flue.
With the right care, a brick chimney can last anywhere from 50 to 100 years, while metal chimneys generally have a lifespan of 15 to 20 years.
Conclusion
As outlined earlier, identifying and addressing chimney flue damage is essential for maintaining a safe home. The chimney flue acts as a critical barrier, protecting against harmful gases, potential fires, and structural issues. When damaged, it can pose serious risks, including exposure to toxic gases and chimney fires that can reach temperatures over 2,000°F in under a minute.
To stay ahead of potential problems, keep an eye out for warning signs like excessive smoke, white stains on masonry, or flaking tiles. Scheduling annual inspections – ideally before the heating season – can help catch issues early. Tackling minor repairs promptly can save you from facing costly replacements later on.
Experts emphasize the importance of professional care:
"Chimney repair is not a job for a DIYer. Doing repairs incorrectly could end up causing further damage to the bricks or liner… risking the health and safety of yourself and your family." – Angi
While basic cleaning and light maintenance might be manageable on your own, structural repairs and liner replacements should always be handled by certified professionals. These experts have the tools, training, and familiarity with building codes to ensure your chimney operates safely and efficiently.
Regular inspections and timely repairs, as discussed in this guide, can significantly extend the life of your chimney. With proper care, masonry chimneys can last up to 50 years, and stainless steel liners can serve you for 15 to 20 years. Addressing small cracks and other issues as they arise is key to avoiding hazards and ensuring your chimney remains safe and functional.
FAQs
What are the signs that my chimney flue might need repair?
If your chimney flue needs attention, there are a few warning signs to look out for. One of the most noticeable is excessive smoke or a strong smoky odor inside your home. You might also struggle to keep a fire burning, which often points to poor drafting. Another red flag is an unusual buildup of soot or creosote in the firebox. These problems can signal a cracked, clogged, or damaged flue liner.
Physical damage is another clue. Keep an eye out for broken or missing flue tiles, rust on metal liners, or water stains near the chimney crown or cap. When water gets into the chimney, it can cause corrosion, crumbling mortar, or even spalling bricks, all of which reduce the flue’s ability to safely vent harmful gases.
Lastly, persistent unpleasant odors, such as smoky or chemical smells, could mean there’s creosote buildup or that the flue liner has been compromised. If you notice any of these issues, it’s crucial to schedule a professional chimney inspection. Ignoring these signs could lead to serious safety hazards, including carbon monoxide exposure or chimney fires.
How do I know if I should repair or replace my chimney flue?
Deciding whether to repair or replace your chimney flue often comes down to the extent of the damage, its age, and the overall cost. If the issues are minor – like small cracks, missing mortar, or localized creosote buildup – these can usually be fixed with targeted repairs. Sealing cracks or patching damaged areas is typically more affordable and can restore the flue’s safety and functionality without requiring a full replacement.
On the other hand, if the flue has widespread cracking, severe water damage, corrosion, or if the liner material (such as older clay tiles) is reaching the end of its usable life, replacement is often the smarter and safer choice. A heavily damaged flue can pose serious risks, such as allowing smoke or carbon monoxide to leak into your home. Upgrading to a modern liner, like stainless steel, not only resolves existing issues but also improves efficiency and ensures compliance with current safety standards.
A good rule of thumb: if repair costs are creeping close to 50%–70% of the cost of a replacement, it’s usually better to invest in a new system. To make an informed decision, have a certified chimney professional inspect your flue and provide guidance based on safety, longevity, and overall costs.
How can I maintain my chimney flue to prevent future damage?
Regular upkeep is essential for keeping your chimney flue in good shape and avoiding costly damage. Start by arranging for a professional chimney cleaning at least once a year – or use a properly sized chimney brush yourself – to clear out creosote, soot, and debris. The best time for this is before the heating season begins. While cleaning, take the opportunity to inspect the flue liner for any cracks, rust, or other signs of wear. If you spot any issues, address them right away to prevent further damage.
To protect your flue, seal small cracks using a high-quality silicone sealant and make sure your chimney cap is in solid condition. A well-maintained cap helps keep out rain, snow, and debris. Also, check the roof flashing to ensure it’s secure, as loose flashing can allow water to seep in, leading to rust or eroded mortar. To cut down on creosote buildup, always burn seasoned, dry wood, and improve airflow by cracking a window or door nearby if you notice downdrafts. These straightforward steps can go a long way in keeping your chimney flue in top condition, ensuring your fireplace runs safely and efficiently.